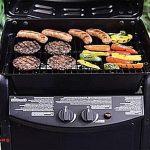
One of the most important parts of any barbecue, the grates, needs our care as we approach grilling season’s zenith. Additionally, Weber stands out among reputable grilling manufacturers because to its innovative designs and high-quality goods.
Stainless steel, porcelain-enameled cast iron, and plated steel are just a few of the grate choices available from Weber, ensuring that there is something for every grill aficionado. However, your grilling experience may be significantly influenced by the specific pros and cons of each variety.
So, let’s get the grills going and see what Weber grill grates are all about.
Contents
- 1 Weber Grill Grates
- 2 3 Main Types of Grates Present on a Weber Grill
- 3 Are Weber Grill Grates Reversible?
- 4 Which Side of the Weber Grill Grates Should You Use?
- 5 3 Simple Steps to Properly Install Weber Grill Grates
- 6 When Should You Replace Weber Grill Grates?
- 7 3 Tips to Increase the Life Span of Weber Grill Grates
- 8 Conclusion
Weber Grill Grates
There are several common misconceptions regarding the proper use of Weber grill grates, including:
The shiny side should always be facing up.
The flat side should always be facing up.
The ridged side should always be facing up.
It doesn’t matter which side is up.
| Misconception | Explanation |
|---|---|
| The shiny side should always be facing up. | Many people believe that the shiny side of Weber grill grates should always be facing up for optimal cooking, however, this is not true as it has no impact on the cooking process. |
| The flat side should always be facing up. | Some people think that the flat side of Weber grill grates must be facing up for better grill marks, but using this side can result in flare-ups and uneven cooking. |
| The ridged side should always be facing up. | There is a widespread belief that the ridged side of Weber grill grates should always be facing up for improved airflow and to prevent food from sticking, but flipping the grates over can result in a more even cooking surface. |
| It doesn’t matter which side is up. | Some may assume that both sides of Weber grill grates are designed for cooking and will result in the same outcome, but each side has its own unique purpose. Using the correct one can greatly impact the cooking process and results. |
To avoid these misconceptions and achieve optimal results when cooking, it’s important to understand the purpose of each side of Weber grill grates.
3 Main Types of Grates Present on a Weber Grill
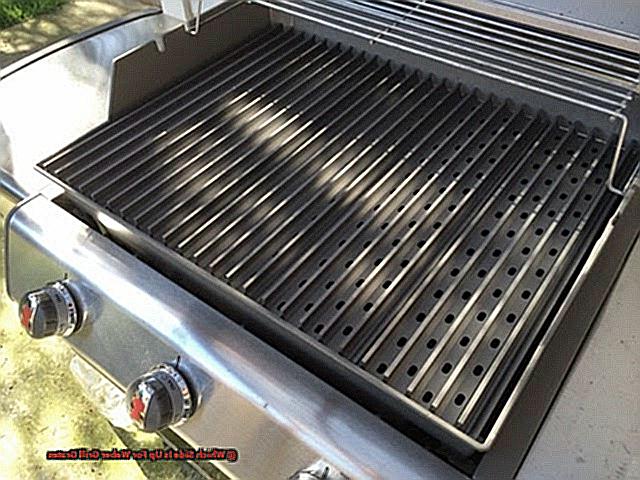
When it comes to Weber grills, one of the key components that sets them apart is the type of grate they use. There are three main types: porcelain-enameled cast iron, stainless steel, and porcelain-enameled steel. Each type has its own unique characteristics in terms of material, heat retention, durability, and cleaning.
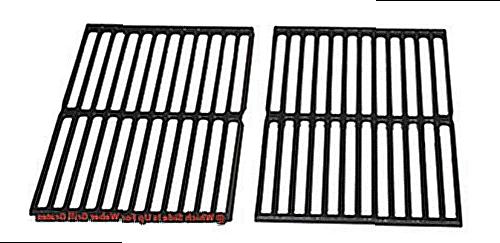
| Grate Type | Material | Main Benefits |
| Porcelain-enameled cast iron | Cast iron coated with porcelain enamel | Durable, excellent heat retention, prevents food from sticking, and easy to clean. |
| Stainless steel | High-quality stainless steel | Resistant to rust and corrosion, even heat distribution, and easy to clean. |
| Porcelain-enameled steel | Steel coated with porcelain enamel | Affordable, offers decent heat retention and easy cleaning capabilities, but may not last as long as cast iron. |
Each type of grate has its own unique material and construction, which results in different benefits. Porcelain-enameled cast iron and steel grates are renowned for their excellent heat retention, which is ideal for searing meat and creating those coveted grill marks. In contrast, stainless steel grates excel in resisting rust and corrosion, making them a top choice for those who live in humid or coastal regions.
Another factor to consider when choosing a grate is weight. Porcelain-enameled cast iron and steel grates tend to be heavier than stainless steel grates, which may affect the time it takes for the grate to heat up. This is something to keep in mind for those who prefer faster cooking times. On the other hand, stainless steel grates may not be as efficient at retaining heat, so there is a trade-off between speed and heat retention.
In conclusion, having a good understanding of the three main types of grates present on a Weber grill and their differences can help grillers make an informed decision based on their specific needs and preferences. Whether it’s for durability, heat retention, or ease of cleaning, there is a Weber grate type that can elevate the grilling experience and result in delectable meals.
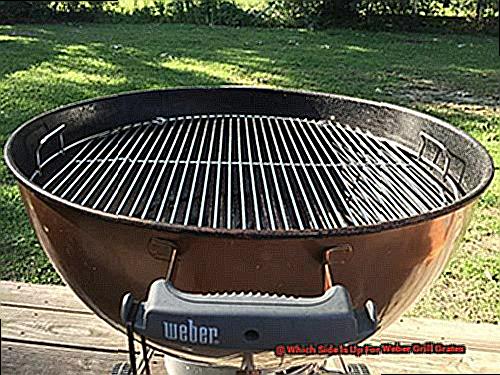
Are Weber Grill Grates Reversible?
Indeed, it is possible to flip over and use the other side of Weber grill grates. Nevertheless, before doing so, it is crucial to take into account the model, cooking temperature and time, and cleanliness to guarantee an optimal grilling experience.
When it comes to Weber grill grates, versatility is key. Not only can you switch between different types of grates depending on your cooking needs, but you can also flip over the grates for even more options. However, it is important to note that not all models of Weber grills have reversible grates. Be sure to check your specific model before attempting to flip the grates over.
Temperature and time are also crucial factors to consider when deciding whether or not to flip over your grill grates. If you are cooking at a high temperature for a short amount of time, flipping the grates may not be necessary. However, if you are cooking at a lower temperature for a longer period, flipping the grates can help ensure even cooking and prevent burning on one side.
Additionally, cleanliness plays a vital role in determining whether or not you should flip your grill grates. If the grates are dirty or covered in residue from previous cookouts, flipping them may result in uneven cooking or even flare-ups. It is always best to clean your grates thoroughly before using them again.
In conclusion, while Weber grill grates are indeed reversible and offer additional cooking options, it is important to consider the specific model, cooking temperature and time, and cleanliness before flipping them over.
Which Side of the Weber Grill Grates Should You Use?
When it comes to using the Weber grill grates, there are many advantages to utilizing both the flat and raised sides. Knowing the differences between these two sides can help you achieve the most satisfying grilling results for your food.
- Enhanced grill marks: The flat side of the grates creates distinct, uniform grill marks on your food, giving it a professional and appetizing appearance. This is especially crucial if you plan on serving your food to guests or for a special occasion.
- Improved heat contact: The raised side of the grates allows for better heat contact with your food, resulting in faster cooking times and more evenly cooked dishes. This is perfect for meats that require quick cooking at high temperatures.
- Versatility: Flipping over the grates provides you with additional versatility in your cooking options. You can utilize the flat side for delicate foods like fish or vegetables, while the raised side is ideal for thicker cuts of meat or larger pieces of food.
- Easy to clean: Compared to the raised side, cleaning the flat side of the grates is much easier as there are no ridges or grooves where food particles can get stuck. This makes maintaining and cleaning your grill a much more convenient task.
To fully take advantage of these benefits, it is important to consider your model of Weber grill, as some may have different grate designs or materials that can affect cooking results. Additionally, you should also take into account the cooking temperature and time for your food, as certain dishes may require a specific orientation for optimal results.
It is also worth noting that many people may accidentally install their grates in the wrong orientation when assembling or replacing them. Being aware of the correct orientation can help prevent this mistake and ensure that you achieve the best results from your Weber grill.
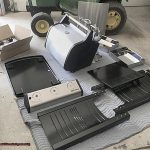
3 Simple Steps to Properly Install Weber Grill Grates
- Step 1: Begin by placing the Weber Crafted frame on the right-hand side of the grill. Make sure that the curved portions of the wire are facing downwards, with the Weber logo towards the front and facing upwards.
- Step 2: Next, place your Dual-Sided Sear Grate over the frame. This ensures even heat distribution and creates those coveted grill marks on your food.
- Step 3: Finally, add a spacer between the Dual-Sided Sear Grate and the front of the grill to ensure stability and prevent any accidents while grilling.
When using cast iron grates, remember to place them with the wider, flat side facing upwards. The underside of the grate is pointed like the top of a triangle, with four small legs in each corner for a level cooking surface. This not only helps keep your food stable while grilling but also ensures optimal heat contact for perfect cooking results.
By following these three simple steps, you can rest assured that your Weber grill grates are properly installed and ready for use. It’s crucial to handle and position the grates with care to avoid any damage or incorrect orientation, which can impact your grilling experience.
When Should You Replace Weber Grill Grates?
Determining when it’s time to replace your Weber grill grates can be a challenging task, as it depends on various factors such as usage frequency and proper maintenance. However, there are specific indications that may suggest the need for a replacement. Below are essential signs to look out for:
- Stains and grease buildup: Over time, grates can become stained and clogged with grease, making them difficult to clean. This buildup can also alter the taste of your food.
- Difficulty cleaning: If you find yourself struggling to clean your grill grates, it may be a sign that they have served their purpose and need replacement.
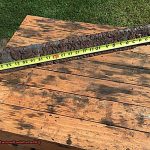
- Rust: Exposure to moisture and outdoor elements can cause grates to rust, which not only looks unpleasant but also impacts their performance.
- Age: If you have been using your grill grates for several years, it may be wise to consider replacing them.
- Damage: Any chips, cracks, or bends in your grill grates can affect their ability to distribute heat evenly and may pose a safety risk.
Additionally, you can refer to your owner’s manual for specific guidelines on when to replace your Weber grill grates based on the number indicated on them. It’s also helpful to routinely inspect your grates for excessive rust, thin spots, or broken welds as these are all indications that they need replacement.
To help you better assess the condition of your grill grates, here is a table showing potential signs that it’s time for a replacement:
| Indications that it may be time to replace your Weber grill grates | Possible replacements | Recommended replacement frequency |
| Stains and grease buildup | Cleaning or replacement | As needed |
| Difficulty cleaning | Replacement | Every 1-2 years |
| Rust | Cleaning or replacement | As needed |
| Age (more than a few years) | Replacement | Every 3-5 years |
| Damage (chips, cracks, or bends) | Replacement | As needed |
By routinely inspecting and maintaining your grill grates, you can extend their lifespan and ensure optimal performance for all your BBQ needs.
3 Tips to Increase the Life Span of Weber Grill Grates
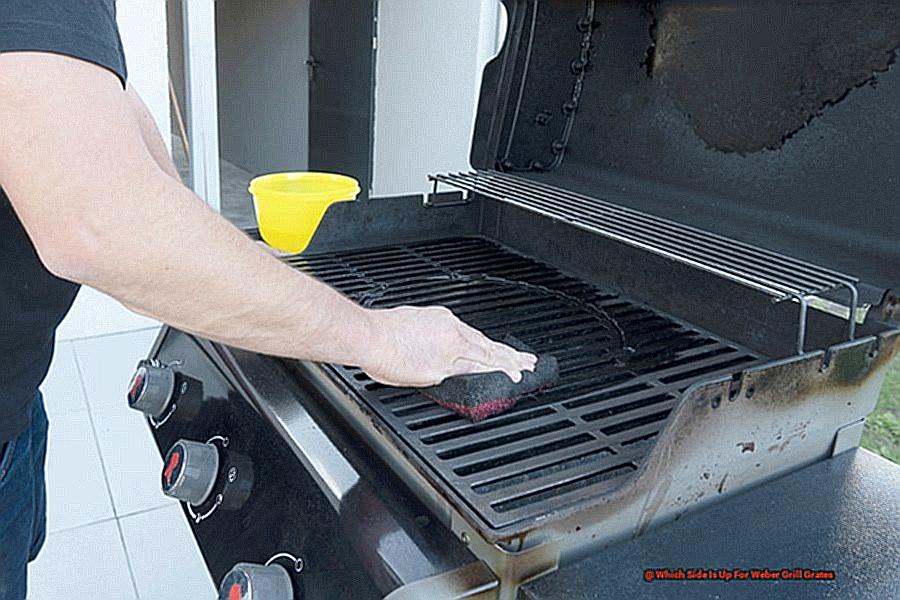
To ensure the durability of Weber grill grates, proper maintenance and care are crucial. Follow these three simple tips to prolong the life of your grates.
Consistent Cleaning:
Regularly cleaning your grill grates is vital in preventing grease, food residue, and debris buildup. This build-up not only affects the taste of your food but also promotes rust and corrosion. To effectively clean your grates, preheat your grill for 15 minutes and use a wire brush to scrub off any residue. For tougher stains, mix warm water with mild dish soap. Dry the grates thoroughly to prevent rusting.
Seasoning:
Seasoning creates a non-stick surface on the grates, making cleaning easier and preventing food from sticking. To season your grates, preheat your grill to high heat and lightly coat the grates with oil using a paper towel. Let the grates heat up for a few minutes until the oil starts smoking, then turn off the heat and let them cool down. This process creates a protective layer on the grates, ensuring their longevity.
Protection from Harsh Elements:
It’s crucial to protect your grill grates from harsh elements when not in use. If you live in a humid or coastal area where saltwater can quickly corrode metal, store your grill in a dry and covered space. Even in drier climates, covering your grill when not in use prevents moisture from getting into the grates and causing rust.
So, consistent cleaning, seasoning, protection from harsh elements, and regular inspection for damage are all essential steps in increasing the lifespan of Weber grill grates. By following these tips, not only will you extend the life of your grates, but you’ll also enjoy perfectly grilled food every time you fire up your barbecue.
Conclusion
As we come to the end of our exploration into Weber grill grates, it’s important to note that there is no definitive “right” side to use. Each type of grate offers its own unique advantages and the choice ultimately depends on personal preference and specific grilling needs. Whether you’re a fan of cast iron for its heat retention or stainless steel for its rust resistance, Weber has a grate option for every backyard BBQ enthusiast.
But let’s not forget that proper installation and usage are key in achieving optimal results. It’s crucial to dispel common misconceptions about which side should face up and understand the purpose of each side. And don’t underestimate the power of regular maintenance and care in extending the lifespan of your grates and ensuring consistently delicious grilled meals.
As we enter the peak of grilling season, let’s keep in mind that with Weber grill grates, the possibilities are endless. From perfectly seared steaks to evenly cooked vegetables, these versatile grates have got you covered.