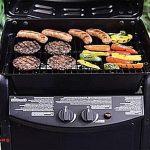
Imagine this: the warm summer sun is shining down on your backyard, and the mouth-watering smell of grilled food fills the air.
You eagerly turn on your trusty Weber grill, but to your dismay, only one burner lights up. What gives?
Don’t worry, you’re not alone in this frustrating situation. Many grill masters have faced the mystery of why only one burner seems to be working.
From troubleshooting tips to potential causes, we’ll get to the bottom of that lone lit burner and have you back to grilling perfection in no time.
Contents
5 Easy Steps to Fix Non-Working Burners on My Weber Grill
As a proud owner of a furry feline companion, I understand the importance of having a fully functional grill for your outdoor gatherings. However, when one of the burners on your beloved Weber grill suddenly stops working, it can be perplexing. But fear not, as an expert on fixing non-working burners on Weber grills, I am here to share with you the 5 easy steps to get your grill back up and running.
Step 1: Shut off the Gas or Electricity
The first and most crucial step is to shut off the gas or electricity supply to your Weber grill. Safety should always be your top priority.
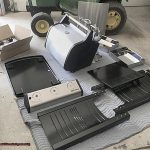
Step 2: Remove the Front Panel
Once the gas or electricity is turned off, carefully remove the front panel of your grill. This will grant you access to the valves and ignitor control board.
Step 3: Unscrew the Panel Beneath the Ignitor Switches
Next, unscrew the panel that is located directly below the ignitor switches. This will allow you to reach the ignitor control board.
Step 4: Tighten the Wires on the Ignitor Control Board
Gently pull down the ignitor control board and tighten each wire. Loose wires can cause issues with proper burner ignition.
Step 5: Reassemble and Restart Your Grill
After tightening the wires, reattach the ignitor control board, panel, and doors. Then, restart your grill and presto. Your burner should now be functioning correctly.
Bonus Tip: Check and Clean/Replace Carry Over Tube
If your burner is still not working after following these steps, it may be due to a dirty or damaged carry over tube. Detach the tube from the grill and clean it using a combination of hot water, vinegar, and baking soda. Alternatively, replace it if necessary. Restart your grill to ensure proper functioning.
How Do You Reset the Regulator on a Weber Gas Grill?
A regulator is an essential component of your Weber gas grill that controls and maintains the flow of gas from the tank to the burners. Over time, due to usage and exposure to weather elements, it may malfunction and cause your burners to stop working. So how do you reset it?
Step 1: Shut off the Gas
The first step in resetting the regulator is to turn off all the burners on your Weber grill and close the tank valve. This will ensure that there is no gas flow during the resetting process, keeping you safe.
Step 2: Wait for 60 Seconds
Patience is key here. While you may be eager to get your grill back up and running, it’s important to wait for at least 60 seconds before proceeding to the next step. This allows any pressure in the regulator and gas hose to equalize.
Step 3: Detach the Regulator Valve
Now that you’ve waited, it’s time to detach the regulator valve from the gas tank. To do this, pull the metal collar towards the tank and then pull the valve in the opposite direction.
Step 4: Turn Burner Knobs to “HIGH”
Next, turn each burner knob to “HIGH” and wait for one minute. This will release any residual gas from the hose and regulator.
Step 5: Hook the Regulator Valve Back Up
After one minute, hook the regulator valve back up to the gas tank. Make sure it’s securely attached.
3 Simple Steps to Properly Clean a Weber Burner Tube
And just like how we keep our pets groomed, our grills also need regular cleaning and maintenance. One essential aspect of grill upkeep is cleaning the burner tubes. In this article, I will walk you through three simple steps to properly clean a Weber burner tube.
Step 1: Ignite your grill
To begin, turn off your grill and fire it up for 10 minutes on high heat. This step helps to burn off any residue or grease that may have accumulated on the burner tubes. Not only does this make cleaning easier, but it also ensures the safety of your grill.
Step 2: Soak the tubes
Next, mix equal parts of white vinegar and water in a large container. Submerge the burner tubes in the solution and let them soak for at least an hour. The acidic nature of vinegar helps break down tough buildup on the tubes, making them easier to clean.
Step 3: Scrub and dry the tubes
After soaking, remove the tubes from the solution and use a soft-bristle brush to scrub away any remaining residue. Be gentle while scrubbing to avoid damaging the tubes. Once clean, dry them with a soft towel to prevent rust or corrosion.
And that’s it. Your Weber burner tubes are now clean and ready for your next BBQ session with your loved ones. Remember to regularly clean the tubes for optimal performance and longevity of your grill.
In conclusion, just like how we take care of our pets, our grills also need some tender loving care. By following these three simple steps, you can ensure your Weber burner tubes are in top condition for your next grilling adventure.
2 Main Reasons Why Weber Crossover Tube Does not Work
Weber grills are renowned for their exceptional performance and durability, but like any other appliance, they can encounter issues. One of the common problems that grill owners face is when the Weber crossover tube fails to ignite one or more burners. This can be frustrating, especially when you’re eager to fire up your grill for a mouthwatering meal. However, there are two main reasons why this essential component may not work as intended.
Dirty or Damaged Carry Over Tube
The primary reason why a Weber crossover tube may fail is due to it being dirty or damaged. As time passes, grease and food particles can accumulate on the tube, clogging it and hindering the transfer of flame. This can also occur if the tube is rusted or has sustained damage.
To address this issue, it’s crucial to remove the dirty or damaged carry over tube from your grill and give it a thorough cleaning. You can use a mixture of hot water, vinegar, and baking soda to loosen any grease or debris stuck inside. If the tube is beyond repair, it’s best to replace it with a new one to ensure optimal functioning.
Aging Process
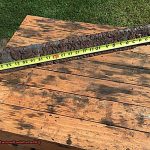
Another common reason for the failure of a Weber crossover tube is the aging process. Just like any other component in your grill, the carry over tube can wear out over time. This can cause it to malfunction and prevent your burners from lighting evenly.
To tackle this problem, you’ll need to remove the cross over tube from your grill and inspect it for any signs of wear and tear. If the tube appears worn out or damaged, it’s time to invest in a new one. This will guarantee that your burners light up efficiently every time you use your grill.
In conclusion, while Weber grills are known for their reliability, even they can encounter issues such as a malfunctioning crossover tube. The two main reasons why this may happen are a dirty or damaged carry over tube and the aging process.
3 Steps to Fix a Low Flame on a Weber Grill
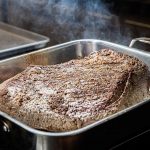
We all know the anticipation of preparing to barbecue a scrumptious feast, only to find that the fire on our Weber grill is dim and struggling to heat up our food.
Don’t let this hindrance dampen your grilling plans – adhere to these three effortless steps to fix a low flame on your Weber grill and resume enjoying perfectly cooked meals.
Step 1: Inspect Your Fuel Level
The first and most apparent step is to examine the level of fuel in your tank. Without sufficient gas, your grill won’t be able to produce a robust flame. If you have a propane tank, ensure it is at least one-third full. If you have a natural gas grill, make sure your gas line is not damaged or obstructed.
Step 2: Adjust the Burner Tube
If your fuel level is not the culprit, the next course of action is to fine-tune the burner tube. This can be accomplished by locating the screw for adjusting the burner tube. Turn it clockwise to amplify the flow of gas and counterclockwise to decrease it.
Make delicate adjustments until you reach the desired fire height.
Step 3: Reset Your Regulator
If tweaking the burner tube does not resolve the issue, then it’s time to reset your regulator. First, switch off all controls on your grill and ensure there are no flames or gas present. Next, close the lid and open the gas valve to allow propane to fill the hose.
Then, turn everything off again, including the gas flow at the tank. Disconnect the regulator from the tank and let everything sit for approximately five minutes. Reconnect the regulator and gradually open the valve all the way.
Finally, wait for 30 seconds before attempting to ignite your grill again.
Conclusion
In conclusion, dealing with a Weber grill that only has one burner lighting up can be quite frustrating. However, fear not, as there are simple steps you can take to troubleshoot and resolve this issue. From checking the fuel level to adjusting the burner tube and resetting the regulator, these straightforward solutions will have your grill back in top grilling shape in no time.
Just like how we give our furry friends regular care and attention, our grills also require maintenance and cleaning for optimal performance. By following the tips and steps outlined here, you can ensure that your Weber grill is always ready to serve up delicious meals at your outdoor gatherings and BBQ parties.