Calling all Traeger fans! Are you ready to elevate your pulled pork game? If you’ve been scouring the internet for tips and tricks, chances are you’ve stumbled upon the hotly debated topic of fat cap placement. Should it be up or down? Today, we’re diving into this juicy dilemma and settling it once and for all. So grab your aprons and get ready to become a pulled pork pro!
So, do you put the fat cap up or down on a traeger pulled pork?
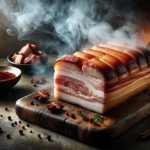
When smoking pulled pork, some recommend putting the fat cap down. The fat cap acts as an insulator, protecting the meat from burning or overcooking. When the fat faces upwards while smoking, it will baste the surface of the meat when it melts, lubricating it.
Here are some other tips for smoking pork butt:
- Don’t trim or use foil
- Cook at 275 degrees until the internal temperature reaches 195°F
- Place the pork in a grill pan with holes
So put those tongs down for a minute and join us as we uncover the truth behind this grilling controversy.
By the end of this post, you’ll have all the knowledge you need to impress your loved ones with succulent Traeger pulled pork. Let’s fire up that smoker!
Contents
- 1 Do You Put The Fat Cap Up Or Down On A Traeger Pulled Pork?
- 2 Understanding the Different Methods: Fat Cap Up vs. Fat Cap Down
- 3 Pros and Cons of Placing the Fat Cap Up on a Traeger Pulled Pork
- 4 Pros and Cons of Placing the Fat Cap Down on a Traeger Pulled Pork
- 5 How to Prepare Your Meat for Cooking: To Trim or Not to Trim?
- 6 Monitoring Internal Temperature: The Key to Perfectly Cooked Pulled Pork
- 7 Tips for Achieving Juicy and Flavorful Traeger Pulled Pork
- 8 Conclusion
Do You Put The Fat Cap Up Or Down On A Traeger Pulled Pork?
The main function of the fat cap on a Traeger pulled pork is to infuse flavor and safeguard the meat’s exterior while it undergoes the smoking process.
The topic of whether the fat cap should be positioned upwards or downwards while cooking is frequently disputed, and the final verdict relies on individual inclination and intended outcomes.
Understanding the Different Methods: Fat Cap Up vs. Fat Cap Down
When it comes to cooking pulled pork on a Traeger grill, there are varying opinions on whether to cook with the fat cap up or down. Both methods have their own benefits and distinctions, and it ultimately depends on personal preference and desired results.
Cooking with the fat cap up may result in a more flavorful end product, as the rendered fat will baste the meat, adding moisture and flavor. This technique can also help protect the meat from drying out during the smoking process.
On the other hand, cooking with the fat cap down can prevent the fat from burning and creating an unpleasant taste. This method may also result in a more evenly cooked product as the heat is evenly distributed throughout the meat.
Moreover, some Pitmasters believe that cooking with the fat cap down allows for a better bark to form on the meat. The bark, a flavorful crust that forms on the outside of the pork during smoking, can be enhanced by cooking with the fat cap down as it prevents half of the pork butt from being covered in fat, which can hinder bark development.
Ultimately, it is up to personal preference and experimentation to determine which method works best for you. However, there are a few tips to keep in mind when cooking pulled pork on a Traeger grill:
- Trim off any excess fat before cooking to prevent flare-ups.
- If leaving the fat cap on, make sure it is no thicker than ¼ inch.
- Consider using Silicone Hot Cooking Bands to secure the meat and promote even cooking.
- Experiment with different rubs and marinades to find your preferred flavor profile.
- Cook for 8-9 hours instead of 14-18+ hours for a quicker and easier process without sacrificing flavor.
Pros and Cons of Placing the Fat Cap Up on a Traeger Pulled Pork
While some believe it adds flavor and juiciness to the meat, others swear by removing it completely for a better bark and texture. In this section, we will explore the advantages and disadvantages of both methods.
Pros:
- Enhanced Smoke and Rub Penetration: Trimming the fat cap off pork shoulder before smoking allows for better smoke and rub penetration, resulting in a more flavorful and well-seasoned pulled pork. This is due to the increased surface area available for the bark to form.
- Prevents Absorption of Subcutaneous Fat: The subcutaneous fat, found just under the skin, does not contribute to flavor and can actually cause a loss of valuable flavor if absorbed by the meat. Removing the fat cap prevents this from happening.
- Easier to Remove After Cooking: Leaving the fat cap on during smoking can result in a stringy texture and make it difficult to remove after cooking. This can lead to a less desirable eating experience for some.
- Allows for Scoring: For those who prefer to leave the fat cap on, scoring it can allow for some flavor to penetrate. However, it is not as effective as removing it completely.
Cons:
- Does Not Add Juiciness or Flavor: Contrary to popular belief, leaving the fat cap on does not add juiciness or flavor to the pork shoulder. The intramuscular fat is what contributes to juiciness and flavor, not the subcutaneous fat.
- Rendered Fat Drips Off: The molecules of oil in the subcutaneous fat are too large to penetrate the meat, and water and oil do not mix. This means that any rendered fat from the fat cap will simply drip off and not contribute to flavor.
Pros and Cons of Placing the Fat Cap Down on a Traeger Pulled Pork
When preparing a traeger pulled pork, the way you place the fat cap can greatly impact the final result.
However, others believe it may hinder smoke penetration and reduce bark development.
How to Prepare Your Meat for Cooking: To Trim or Not to Trim?
While some contend that removing the fat cap would produce a thinner cut of meat, others think that doing so will improve the meat’s taste and juiciness. We shall discuss the advantages and disadvantages of each choice below.
The best course of action for you could be to clip the fat cap if you want a leaner cut of meat. But take care as you do this so as not to remove any flesh from underneath. You may also render the extra fat and use it to make cracklings or other foods.
However, there are benefits to keeping the fat limit in place as well. The fat keeps the meat wet and delicious during cooking by acting as a protective covering. Additionally, it makes pulled pork more juicy without running the danger of losing any flesh. It may not render as much fat, however, and the meat could have a thicker peel on top of it.
Monitoring Internal Temperature: The Key to Perfectly Cooked Pulled Pork
The key to perfectly cooked pulled pork on a Traeger grill is monitoring the internal temperature. This is crucial as it guarantees tender, succulent, and flavorful meat that effortlessly falls apart. To achieve this, the recommended internal temperature range is between 195-204 degrees Fahrenheit.
This allows for the breakdown of connective tissue and rendering of fat in the meat.
| Internal Temperature | Result |
|---|---|
| Below 195°F | Tough and chewy meat |
| 195-204°F | Tender, juicy, and flavorful pulled pork |
| Above 204°F | Dry and overcooked meat |
The cooking time required for pulled pork may vary depending on the chosen method. However, it is recommended to start cooking early and use a meat thermometer for accurate monitoring of the internal temperature. This is particularly important for long cooking times that can range from 4-16 hours, depending on the size of the cut and cooking technique.
The type of cut used also plays a crucial role in achieving perfectly cooked pulled pork. Pork shoulder or butt are preferred due to their high-fat content and connective tissue. Before cooking, it is advisable to trim off any excess fat and pat the pork dry to help seasonings adhere and produce a crispy bark.
There are several methods for cooking pulled pork on a Traeger grill, such as low and slow smoking or using the “turbo” method at higher temperatures. However, regardless of the chosen method, the key is to cook at a low temperature for an extended period until the desired internal temperature is reached.
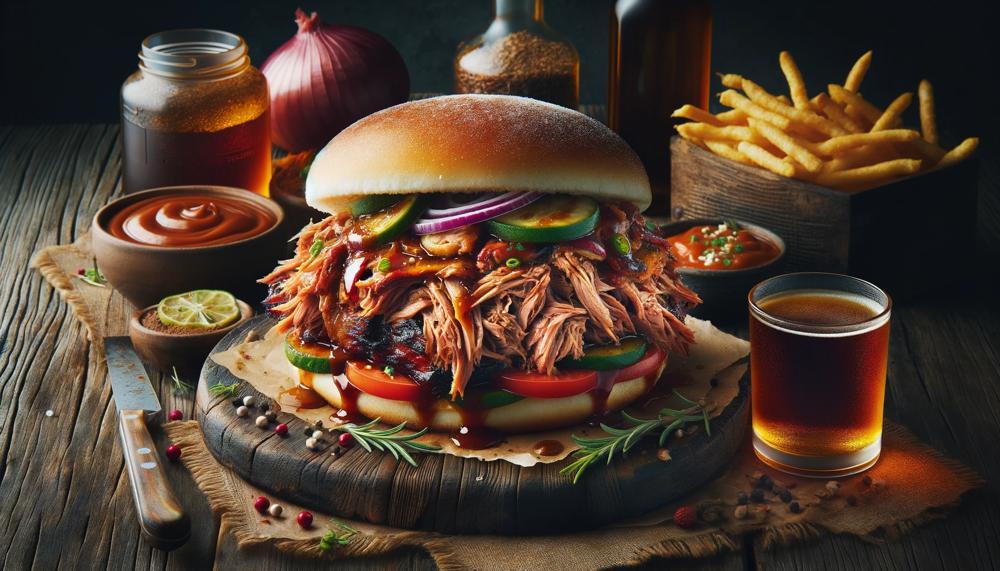
After reaching the ideal temperature, it is essential to let the pork rest for at least 30 minutes. This allows the meat to cool down and reabsorb its juices, resulting in a tender and juicy final product. Once rested, the pork can be shredded using two forks or meat claws and served with barbecue sauce or on buns for mouth-watering pulled pork sandwiches.
Tips for Achieving Juicy and Flavorful Traeger Pulled Pork
To achieve mouth-watering and savory Traeger pulled pork, it is essential to apply proper preparation and cooking techniques. Here are some tips to ensure that you end up with a delicious and flavorful dish:
| Step | Tips |
| 1. Pick the right cut of meat | – For optimal results, opt for a Boston butt or picnic roast. – These cuts have an ideal amount of marbling and connective tissue, which contribute significantly to the meat’s juiciness and flavor. |
| 2. Marinade and dry rub | – To add depth of flavor, combine a tangy marinade and savory dry rub. – For the best results, let the meat marinate for at least four hours or overnight if possible. – Be generous with the dry rub on all sides of the meat before cooking. |
| 3. Slow smoking process | – The secret to tender and succulent meat is using the low and slow cooking method, allowing the flavors to develop and collagen to break down. – For optimal results, maintain a consistent temperature of 225-250°F. – To add a smoky flavor, use wood pellets like hickory or applewood. |
| 4. Keep an eye on internal temperature | – Use a meat thermometer to accurately determine when the pork is fully cooked (around 200°F) and tender enough to shred. – Make sure to insert the thermometer into the thickest part of the meat, avoiding contact with bone or fat. |
| 5. Let it rest | – After cooking, let the smoked pork butt rest for about 30 minutes to allow the juices to redistribute throughout the meat, resulting in a more flavorful and moist dish. |
By following these tips, you can create an impressive and delectable Traeger pulled pork that will leave your friends and family in awe. Remember to keep an eye on the internal temperature and use a meat thermometer for accurate results.
Conclusion
In summary, there is no definitive answer to the age-old question of whether to put the fat cap on a Traeger pulled pork upside down or upside down. Both strategies have benefits and drawbacks, but in the end, technique and personal choice win out. But worry not—you can make a delicious meal that will have your guests clamoring for more with a few professional tips and tactics.
Choosing the appropriate piece of meat is the first step in making the ideal pulled pork. Tender, juicy meat comes from a well-marbled chunk with enough of fat. Next, use a marinade and dry rub combo to enhance the taste. This will assist to tenderize the meat in addition to giving the flavor more depth.
Maintaining uniformity is essential while cooking on a Traeger. Throughout the smoking process, keep the temperature constant to guarantee consistent cooking and prevent any dry or harsh places. The internal temperature will also tell you when your pork is done, so keep an eye on it.
Finally, before serving, remember to let your meat rest. This makes room for the liquids to redistribute, which enhances the taste of the finished product. Remembering these pointers, feel free to try out several approaches to see which one suits you the best.