Are you tired of constantly babysitting your Traeger grill, constantly adding wood pellets to keep the fire going? Well, say goodbye to that hassle and hello to convenience with the Traeger auger charging process. This game-changing feature allows you to enjoy uninterrupted cooking without constantly monitoring or refilling your pellets. In this blog post, we will walk you through the simple steps of charging the auger on your Traeger grill, so you can spend more time savoring delicious BBQ with loved ones. Get ready to discover:
- What exactly is an auger and how does it work?
- The numerous benefits of using a Traeger grill equipped with an auger
- Step-by-step instructions for easily charging the auger
- Essential tips for maintaining and troubleshooting your auger
- How this innovative feature elevates your overall grilling experience
Get ready to take your grilling skills up a notch as we delve into the world of Traeger grills and their revolutionary auger technology.
Contents
- 1 How to Charge the Auger on a Traeger Grill
- 2 How Do You Prime a Traeger Auger?
- 3 Do You Have to Prime the Auger on a Traeger Every Time?
- 4 What is the Exact Process to Charge the Traeger Auger?
- 5 What Are Traeger Initial Firing Instructions?
- 6 What Should You Do If Your Traeger Auger Isn’t Turning?
- 7 Do You Have to Prime the Auger on a Traeger Every Time?
- 8 What is the Exact Process to Charge the Traeger Auger?
- 9 What Are Traeger Initial Firing Instructions?
- 10 What Should You Do If Your Traeger Auger Isn’t Turning?
- 11 Conclusion
How to Charge the Auger on a Traeger Grill
To optimize the performance and longevity of your Traeger grill, it is crucial to properly charge the auger. Follow these steps for the best results:
- Before beginning the charging process, make sure to turn off the grill and allow it to cool down.
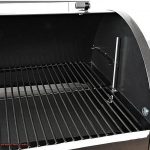
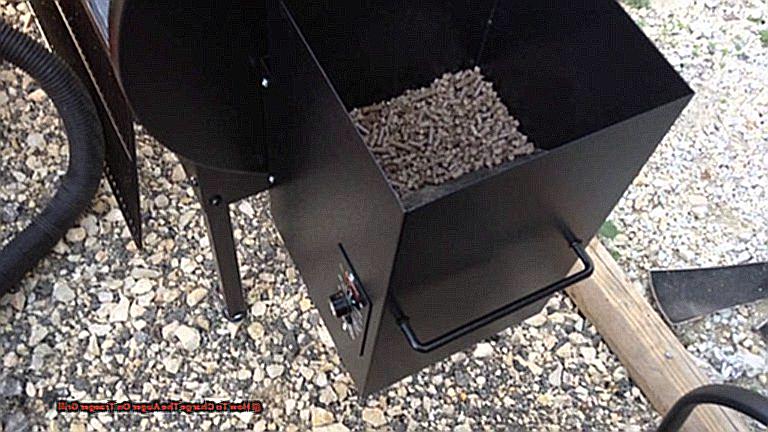
- Load high-quality, food-grade wood pellets into the metal hopper located inside the smoker.
- Connect an external charger to the auger and plug it into a power outlet. The recommended charging time is approximately eight hours. This method is known to be the safest and most effective way to charge the auger.
- If you are considering swapping out batteries, be sure to use specific Traeger auger batteries and follow all safety protocols.
- For those familiar with grills, connecting directly to a power source may be an option, but it should be done with caution and knowledge of proper procedures.
- After charging, it is important to always prime the auger before use by heating it up for 10-15 minutes and adding pellets once preheating is complete. This step ensures even cooking and prevents clogs.
- If you encounter any issues with the auger not turning on, check that the switch is in the on position, inspect for any damage or loose wires, and consider replacing the motor if necessary.
- To maintain optimal performance and prevent potential issues, it is recommended to prime the auger before every use.
In conclusion, properly charging the auger on your Traeger grill is crucial for maintaining its performance and longevity.
How Do You Prime a Traeger Auger?
For optimal performance of your Traeger auger while charging the grill, it is crucial to follow these priming steps:
- Heat up the grill: Prior to charging the auger, preheat your Traeger grill to a high temperature of 450-500 degrees Fahrenheit. This will warm up the pellets and make them easier to push through the auger.
- Inspect hopper and pellets: Ensure that your hopper is clean and free of debris or old pellets. Use top-grade, food-grade pellets recommended for Traeger grills.
- Turn off the power: Before attempting to charge the auger, disconnect the power source from the grill as a safety precaution.
- Connect the charging cord: Locate the designated port for charging the auger and insert the charging cord. You can use an external charger or plug it into a power outlet or Traeger’s power adapter.
- Charge for eight hours: The recommended method for charging the auger is through an external charger, which takes approximately eight hours to complete. This guarantees a full charge and proper functioning of the auger.
- Check for damage or loose wires: If your auger fails to turn on your Traeger, ensure that the switch is turned on and inspect for any damage or loose wires.
- Prime before each use: It is essential to prime the auger before each use of your Traeger grill. This prevents clogging and ensures even cooking.
By following these steps, you can ensure that your Traeger auger functions properly and enhance your grilling experience.
Do You Have to Prime the Auger on a Traeger Every Time?
No, it is not mandatory to prime the auger on a Traeger grill before every single use. However, there are certain circumstances where priming the auger is essential for achieving optimal performance.
When you first season your Traeger grill, it is crucial to prime the auger before using it. This process involves preheating the grill, using high-quality pellets, and letting the auger charge for eight hours. By priming the auger initially, you ensure that it is adequately lubricated and ready for use.
Another scenario where priming the auger is necessary is after purging the auger tube. This can occur if there are any blockages or buildup in the tube, which can affect the flow of pellets. By priming the auger after purging, you guarantee that it is functioning correctly once again.
Lastly, if your pellet hopper runs out of pellets, you will need to prime the auger before adding more pellets. This ensures that there is a continuous flow of pellets into the firepot and that your grill operates smoothly.
However, once you have primed the auger in these situations, there is no need to do it before every single use. The only exception would be if you have not used your Traeger grill for an extended period of time. In this case, it is recommended to prime the auger again to ensure proper functioning.
In summary, while it is not necessary to prime the auger on a Traeger grill before each use, it is crucial to do so in specific situations for optimal performance.
What is the Exact Process to Charge the Traeger Auger?
When it comes to charging the auger on your Traeger grill, here’s how you can do it:
- Turn off and unplug the grill: For safety purposes, it’s important to turn off and unplug your Traeger grill before charging the auger.
- Empty out any remaining wood pellets from the hopper: To avoid any confusion or mixing of different types of pellets, it’s recommended to remove any leftover pellets from the hopper before charging the auger.
- Pour in the desired amount of pellets: Depending on your cooking needs, pour in the desired amount of wood pellets into the hopper. Just make sure not to go over its capacity, as this can affect the performance of the auger.
- Plug in and turn on the grill, then set the temperature: After adding the pellets, plug in your grill and turn it on. Set the temperature according to your cooking preferences.
- Alternatively, take out the auger from the grill: If you prefer, you can also remove the auger from the grill and lay it flat on a work bench or table to charge it separately. This can be helpful if you’re having issues with your grill or need to charge the auger alone.
By following these simple steps, you can efficiently charge the auger on your Traeger grill and get ready to cook up some mouth-watering BBQ in no time. Remember to always handle the auger with caution and observe proper safety measures while charging it.
What Are Traeger Initial Firing Instructions?
Step-by-Step Guide to Charge the Auger on a Traeger Grill:
- Turn off and unplug the grill: For safety reasons, it is crucial to turn off and unplug your Traeger grill before beginning the charging process.
- Empty out any remaining pellets: Before adding new pellets, ensure that there are no remaining wood pellets in the hopper.
- Pour in desired amount of pellets: Using a funnel, pour the desired amount of wood pellets into the hopper. The amount may vary depending on how long you plan to use the grill.
- Plug in and set temperature: After adding the pellets, plug in the grill and set the temperature to your desired level using the temperature dial.
- Optional step: Remove auger from grill to charge separately: If preferred, the auger can be charged separately by unscrewing it from the grill and plugging it into an outlet with an extension cord.
In conclusion, charging the auger on a Traeger grill is a straightforward process that takes only a few minutes. Safety should always be a top priority when handling the grill and adding or removing wood pellets.
What Should You Do If Your Traeger Auger Isn’t Turning?
If your Traeger grill’s auger is not turning properly, there are several actions you can take to diagnose and resolve the issue. These include checking the power supply, inspecting the auger tube and hopper for any blockages, and ensuring that all other components, such as the fan and hot rod, are functioning correctly. If these steps do not solve the problem, you may need to replace the auger motor or seek assistance from Traeger’s customer support.
What Should You Do If Your Traeger Auger Isn’t Turning?
- Check the Power Supply: The first step to take if your Traeger auger is not turning is to verify the power supply. Ensure that your grill is plugged in, and the outlet is in good working condition. It’s also a good idea to check the display screen for any error codes that may indicate an issue with the power supply.
- Inspect the Auger Tube and Hopper: Next, examine the auger tube and hopper for any obstructions or bridging of pellets. This can happen if the pellets contain excess moisture or have been stored improperly. Clear out any debris or pellets that may be causing a blockage.
- Check the Fan, Hot Rod, and Firepot: These critical components work together to produce heat and smoke in your Traeger grill. If they are clogged or malfunctioning, it can affect the performance of your auger. Make sure they are clean and in good working condition.
- Verify the Pellet Jam Switch: Your Traeger grill has a pellet jam switch that automatically shuts off the auger motor when it detects a jam. Check this switch and ensure it is not engaged, as this can cause your auger to stop turning.
- Consider Replacing the Auger Motor: If none of these steps resolve the issue, you may need to replace the auger motor. This component is responsible for turning the auger and can wear out over time. You can purchase a replacement motor directly from Traeger or through an authorized dealer.
In conclusion, if your Traeger auger is not turning, follow these steps to troubleshoot and resolve the issue. By checking the power supply, inspecting for blockages, and ensuring all components are functioning correctly, you can get your grill back up and running in no time. If these steps do not work, consider replacing the auger motor or reaching out to Traeger’s customer support for further assistance.
Do You Have to Prime the Auger on a Traeger Every Time?
The short answer is no. Priming the auger is only necessary in specific situations, such as when first seasoning your grill, purging the auger tube, or if the hopper runs out of pellets. Once the auger has been primed, there is no need to repeat the process unless you run out of pellets again. Let’s take a closer look at when and how to prime the auger on your Traeger grill.
| When to Prime the Auger | How to Prime the Auger |
| When seasoning your grill for the first time. | Turn on your grill and set it to its highest temperature. |
| After purging the auger tube, for example when switching pellet flavors. | Open the hopper lid and add a handful of pellets to the hopper. |
| If your hopper runs out of pellets. | Turn off the grill and unplug it from the power source. |
| Remove any remaining pellets from the firepot and empty the hopper. | |
| Take out the auger by unscrewing the bolts at both ends. | |
| Using a long screwdriver, manually push any remaining pellets out of the auger tube. | |
| Reattach the auger and plug in your grill. | |
| Turn on your grill and set it to its highest temperature. |
It is essential to note that over-priming the auger can cause damage to the auger motor and other components of the grill. Therefore, it is crucial to only prime the auger when necessary. Additionally, using Traeger brand pellets is highly recommended as they are specifically designed for Traeger grills and will ensure optimal performance.
In conclusion, priming the auger on a Traeger grill is not required every time you use it. It should only be done in certain situations and with caution to avoid any potential damage to your grill.
What is the Exact Process to Charge the Traeger Auger?
How to Charge the Auger on a Traeger Grill:
Step 1: Prepare Your Grill
Ensure that the temperature dial is turned to either “Off” or “High” to prevent any accidents during the charging process.
Step 2: Access the Hopper
Open the metal lid on the grill’s wood pellet hopper. This will give you access to the chamber where you will load the pellets.
Step 3: Load the Pellets
Carefully pour the wood pellets into the chamber, or use a funnel if needed. For best results, it is recommended to use high-quality pellets, preferably from Traeger brand. Avoid mixing different types of pellets as this can impact the flavor and burning of your food.
Step 4: Start the Auger
Turn the on/off/temperature dial to “High” to activate the auger’s motor. This will push the pellets from the hopper into the firepot.
Step 5: Set Your Desired Temperature
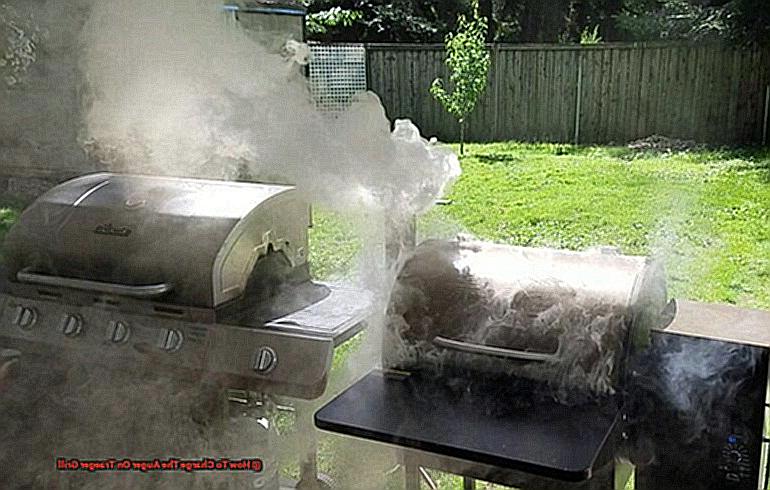
Switch the knob to “Smoke” and then adjust the control to your desired temperature. This will allow your grill to preheat while giving enough time for the pellets to ignite and create smoke.
Step 6: Monitor Pellet Levels
While your grill is running, keep an eye on the pellet level in the hopper. If it starts getting low, repeat steps 2-5 to add more pellets.
By following these simple steps, you can easily charge the auger on your Traeger grill and enjoy delicious, smoky BBQ.
What Are Traeger Initial Firing Instructions?
When it comes to charging the auger on your Traeger grill, there are several methods you can choose from, depending on your model and personal preferences. Properly charging the auger is crucial for maintaining peak performance and prolonging the lifespan of your grill.
- Using an External Charger: This is the safest and recommended method for charging the auger. Simply purchase a designated external charger for your Traeger auger and plug it into a power outlet. This ensures proper charging and minimizes any potential safety hazards.
- Swapping Out Batteries: Some Traeger models allow for battery replacement in case of low power or damaged batteries. However, this method is not as safe as using an external charger and should be done with caution. Follow proper handling procedures and only use designated batteries for your Traeger grill.
- Connecting to a Power Source: This method should only be attempted by experienced individuals. You can connect the auger directly to a power source using applicable wires, but it comes with its own set of risks and is not recommended by Traeger unless absolutely necessary. Be sure to follow all safety precautions and disconnect power before any work is done.
- Priming the Auger: Before first use, it is important to prime the auger by heating up the grill in Smoke mode for 10-15 minutes, then adding 2-3 cups of pellets into an empty hopper. This ensures that the auger is functioning properly and prevents any potential clogging.
- Troubleshooting: If your auger fails to turn on, first check that the switch is turned on and inspect for any damage or loose wires. If you are unable to resolve the issue, contact customer support for assistance.
- Regular Maintenance: To ensure even cooking and prevent clogging, it is important to prime the auger every time you use your Traeger grill. Regularly cleaning and maintaining your grill is also crucial for optimal performance.
In conclusion, charging the auger on your Traeger grill is a vital part of maintenance and guarantees mouthwatering BBQ every time.
What Should You Do If Your Traeger Auger Isn’t Turning?
If your Traeger auger is not turning, there are several ways to troubleshoot and resolve the issue. Follow these steps in order to determine the cause and find a solution.
- First, check the power supply and display screen for any error codes. Make sure your Traeger grill is properly connected to a power source and that there are no issues with the power supply. Additionally, inspect the display screen for any error codes that may indicate an issue with the auger.
- Next, examine the auger tube and hopper for any blockages or bridging of pellets. At times, pellets can become stuck or bridged in the auger tube or hopper, causing the auger to malfunction. Use a long object, such as a wooden spoon, to clear any blockages or break up any bridged pellets.
- Check the fan, hot rod, and firepot for any clogs or excessive heat. A clogged or malfunctioning fan, hot rod, or firepot can also affect the performance of the auger. Ensure that these components are clean and functioning properly.
- Verify that the pellet jam switch is not engaged. The pellet jam switch is a safety feature that will stop the auger from turning if it detects a jam. Ensure this switch is not engaged before attempting to restart the auger.
If none of these steps work, consider replacing the auger motor or contacting customer support.
If all other attempts fail, there may be an issue with the motor of your Traeger auger. In this case, it may need to be replaced. If you are unsure of how to do this yourself, it is recommended to contact Traeger customer support for assistance.
By following these troubleshooting steps, you should be able to identify and resolve any issues causing your Traeger auger to not turn properly.
Conclusion
In conclusion, the Traeger grill’s auger charging feature is a game-changer that eliminates the need for constant monitoring and refilling of wood pellets.
By following our simple guide, you can effortlessly charge the auger and spend more time savoring delicious BBQ with your loved ones. This revolutionary technology not only saves time and effort but also enhances your overall grilling experience.
Just remember to handle the auger with care and follow essential maintenance and troubleshooting tips for optimal performance.